Saturday 29 June 2013

Canada Day Piano Style ♫


It's the long weekend wahoo, and Canada Day on Monday which means red and white all over, fireworks and O Canada so I thought I would jump on the maple leaf boat and do something fun with my piano students this week!

Summer lessons have begun, and I like to make these a little different to our regular weekly ones.  Last year I did Piano Olympics, to tie in with the London 2012 Summer Olympics... see that here ...so I have been trying to think of ways to do some fun musical things these coming weeks!

I have decided to do various themed weeks.  As I am still teaching regular 45 minute lessons in their homes it needed to be something to incorporate within this time frame still giving us time to hear practiced songs, learn a new piece and go over some theory or ear training.  So for each week there would be a fun element or new thing to learn :-)

Coming up this week is Canada Day of course!


Every student will learn O Canada, and I have made a note naming maple leaf worksheet for a theory element of the lesson.  And then the best bit!  GAME TIME!  I have been wanting to make my own musical bingo sheets for a while now, and every time I can (and have time) I love to make new worksheets.

One of my own piano teacher aims this year was to come up with my own worksheets to use with my students in their piano lessons.  This way I can create the colours I want, and things specific to my students needs and levels.  However, I have put them into pdf as well so if anybody else wants them you are SO welcome!  I would love that!  I love having fun worksheets and games to use, and since discovering amazing music teacher sites such as Susan Paradis and Color In My Piano I have used a bunch of their great printables, but also had the inspiration to make my own :-)

I'm learning slowly and discovering new and better ways to do this and Joy from Color in My Piano has REALLY been helpful for my Canada Day worksheet and game!  Thank you Joy!  She has a great template, and set of musical symbols that you can download, resize as you need and then use them for what ever project you're working on!

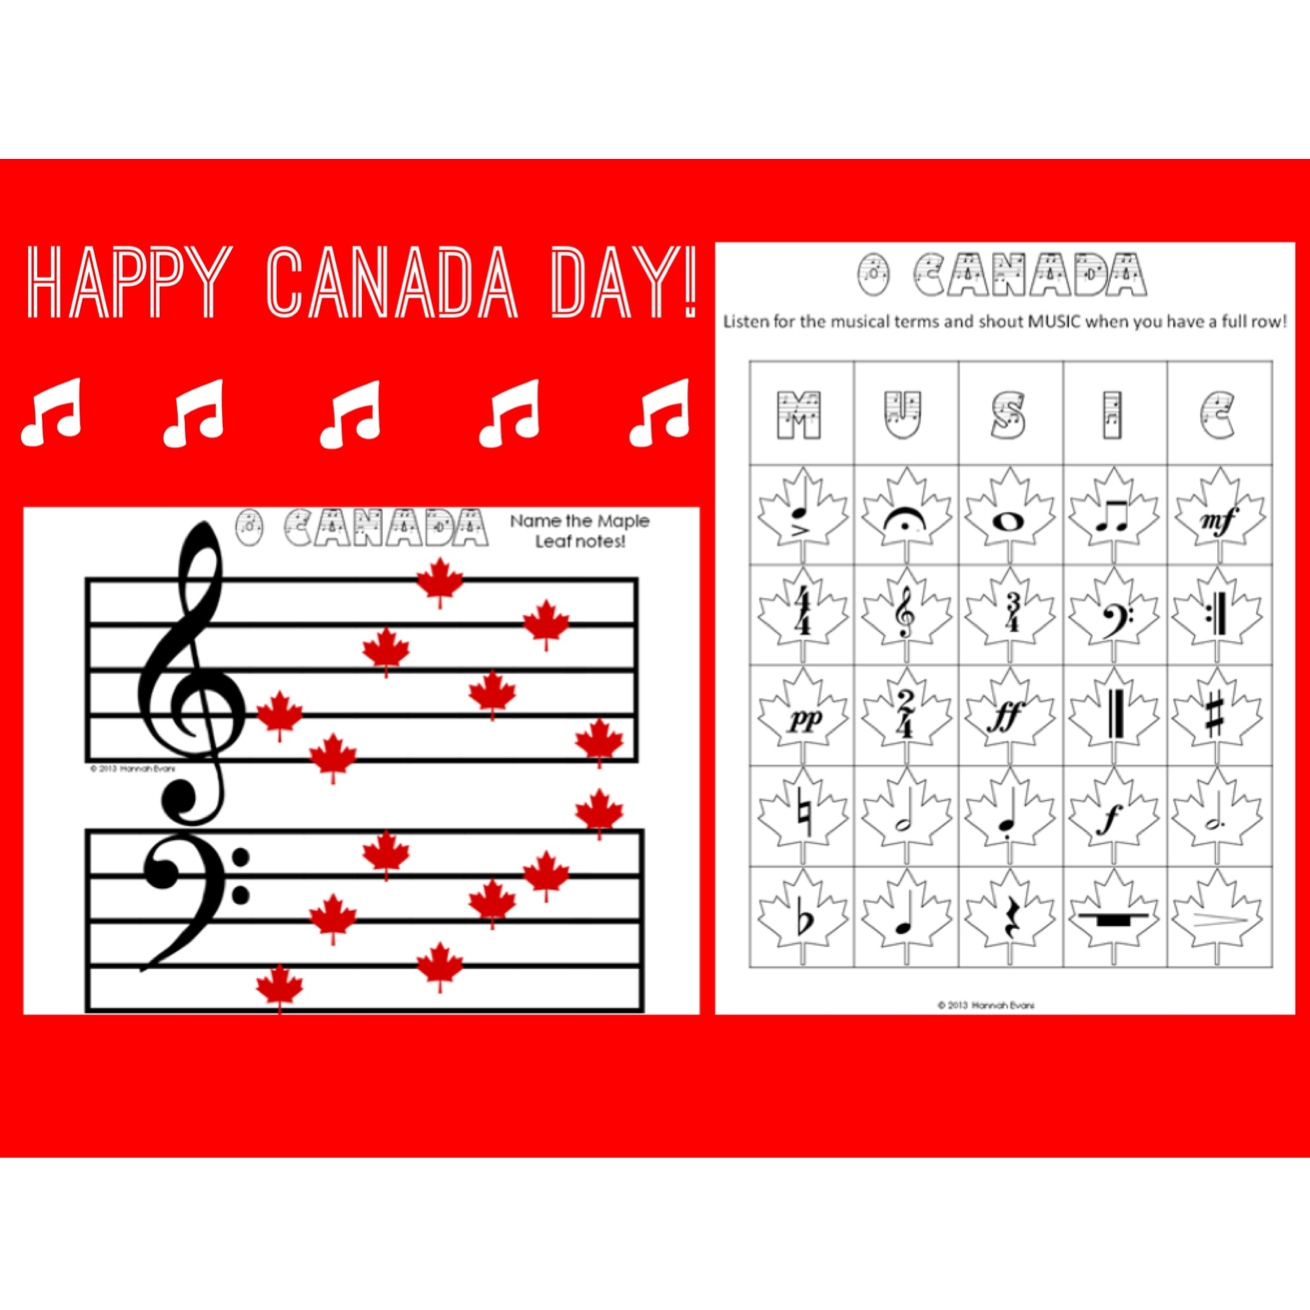
For me this time first up was a note naming worksheet.  Maple leaf style of course!


Here's how it looks!  And get the PDF here

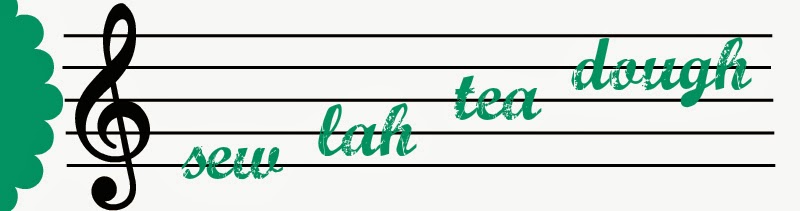
I created it using the blank treble and bass clef staffs from Joy, and then spent FOREVER looking for the perfect maple leaf that would sit on a line or a space blank to fill in the notes.  I'm pretty happy with the one google finally provided me with!!  I also used my favourite music font for the O Canada title... Search for DTNoted and you'll get this great one :-)  

My first students tried it out on Friday, how nice that her red guitar was sat on the table when it was photo time (actually, honestly!). 


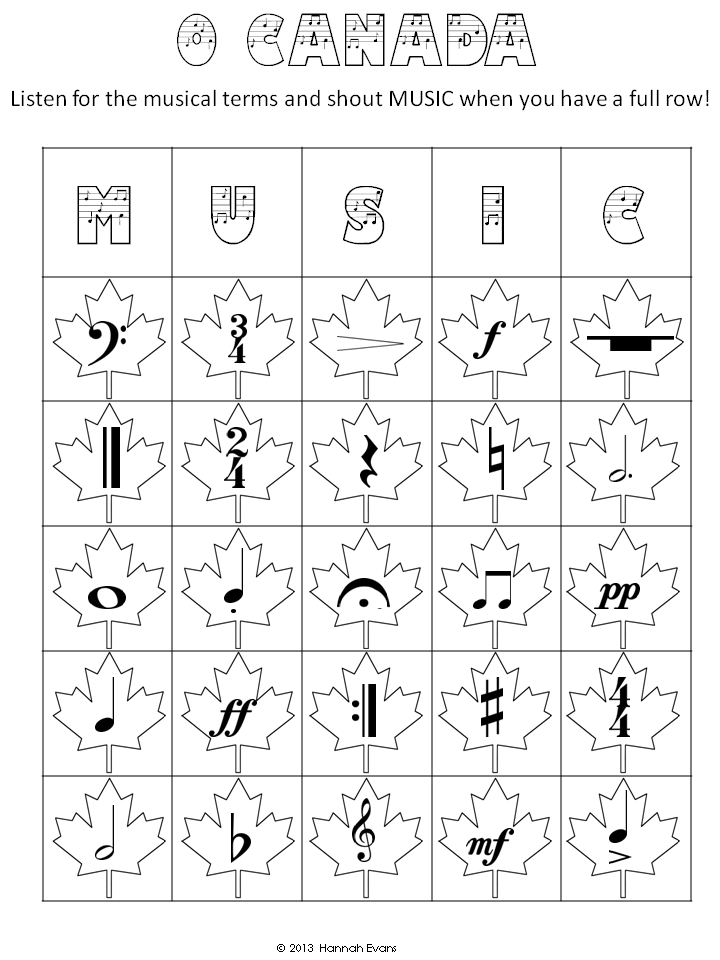
Alright, worksheet done - now to devise a game with a Canada Day twist!  My first thoughts were to make a musical bingo to test my student's musical symbol knowledge!  Something I wanted to work on particularly with a few :-P  I was thinking red counters to place on the maple leaf spaces, and then a Canadian treat as a prize. 


With a lot of moving around symbols, a lot of resizing maple leafs and then the realisation I would need more than 1 bingo sheet I was done!

I came up with 3 different sheets... same symbols but in different positions on the table so that the students playing wouldn't get bingo at the same time!  In the PDF (click here!) I also included a blank sheet just in case.


I printed the bingo sheets on card stock and didn't yet, but would like to laminate these just to keep them as long as possible.  Instead of marking on each square (maple leaf!) when it is called, I got some red counters (from a dollarstore Connect 4 game) so that it could be reused.  This actually worked really well, then when the game was over they could just move away the counters and re-start.

*** Writing this now, I realise that after each game or 2 the students should have also switched cards so that it was a fresh set of musical symbols in different positions on the sheet - probably they got used to where things were after a few games?! ... Ah well, next week! ***

I read out the musical symbols in a random order, and from the list you see below (might have to click to zoom) marked them off as I said them to keep track, and so that when the game was over we could confirm if I had indeed said them!  A couple of the symbols were unknown to the students I played with on Friday, but one sister taught her other sister what something meant, and then we learnt what 'fermata' was as we went along.  I also made them 'reveal' their completed row, just to check they did in fact know what the symbol was and weren't guessing!


I tried this out with 2 girls on Friday and we had SO MUCH fun!!!!!  We played 8 games of it in all, and by the end each girl had won 4 chocolate dollars each!  Check out the final winning game - I went pretty quickly reading them out and she ended up with 3 complete rows before she realised she had won! 


A lot of fun, and I can't wait to play it with all of my students this week ♫

Happy Canada Day everybody, enjoy the long weekend either this weekend or next if you're celebrating in the States :-) 

...PS I'll be doing some 4th July piano things on Thursday too with my Canadian-American students!  It's going to be a fun week!

Saturday 22 June 2013

A Book for You, to Play and To Do!

Last weekend we celebrated our most favourite little girl's 2nd birthday!!  We cannot believe it is nearly 2 years since she travelled all the way to England for our wedding, when she was just a tiny 8 week old, our most special youngest guest :-)  And now here she is, a fun loving busy 2 year old!  We love hanging out with her (and her parents :-P)  and there's always lots to do, books to be read, things to be shown/played with etc so I knew I wanted to make a gift for her that went along with some of the things she has already learnt or is learning or would enjoy.

My original idea was to make some stuffed felt letters and numbers (I might still make these Krista!), but then when the ideas got whirring, I knew this was the correct choice.

A BOOK!  Not just the alphabet or numbers, but more!


I began by writing a list of all the different ideas I had for pages, and well, that list got long...really long!  I had to pick my very favourites (this time around anyway!).  After a lot of research on types of books, how to bind them, what materials to use etc this is what I came up with:

I used a 'Mini' Avery purple binder (5 1/2 x 8 1/2 inches) which had a 1 inch width.  I chose this for a few reasons... 1, you can't go wrong with purple in my opinion.... 2, it had a plastic covering to the binder which means it is 'wipe clean', and I could also add a front cover to it! 

I added a Martha Stewart zippered pouch to the back (also in this cute mini size!), thinking about the future, for missing pieces, or for a quick tidy up :-)
And then for the pages, I chopped up some white card stock to match the mini half letter size pages, and punched 3 holes in them.  I stuck down the no-tear clear hole reinforcers for bonus protection from toddler grabs!

I didn't glue the felt on right away, but did cut out sheets of coloured felt that would later stick right on to the white card stock (which was mainly for strength anyway)...


All prepped and ready to get to work on the pages!  I have a lot of final product photos, and a few of the individual pieces as I went along, so I will just show you each page as it appears in the book!  


Can you Count?

Created using brightly coloured star beads threaded abacus style onto thin purple ribbon.

Fiddly cutting out of numbers 1-10 in purple felt, and then lots of hot glueing to firstly attach the ribbons (triple counting the beads as I went along to make sure there were no errors!), and then 2 yellow ribbons to seal the edges.


Beads being prepared... this was the first page in the book and also the first page I started on.  It was right here that I realised my initial 20 page ideas were probably not going to happen!


The text boxes were one of the final things I added to each page (you'll see more as you go along!).  I used this great font 'Little Miss Prissy' and created a simple fun shaped text box in word.  I thought this was a nice kid friendly font, but one that still had all the letters in proportion to one another and then, more hot glue stuck the card stock down :-)


Match the Shapes

Guess what you have to try and do here!  That's right... match up the shapes to the outlines!  


This is the point that I realised I had to work with each felt page BEFORE glueing down to the card.  This allowed me to sew on it, draw on it, attach velcro etc before sticking it down!


5 shapes cut out firstly on card stock in various colours to use not only as a template, but also a backing to the felt.  Then came the felt cutting... before being traced on the opposite page in permanent marker.  


In the middle of each shape outline I then attached velcro (hook side) to the felt using my sewing machine.  The sturdier the better I thought!

I glued each felt shape to the matching card, and then with adhesive velcro this time attached the loop side to the back of each.

Next step was to use a sheet of felt and machine sew it down (as if it were being hemmed so there was a folded outside edge) on the two sides, and the bottom edge.  Voila, a pocket for the shapes to be matched!


Pretend to Play!

That's right, I'm a music teacher so of course there had to be a musical page!  For this one, I racked my brain about how I could make a musical page without using actual sounds.  Was this falling into the 'quiet book' category, in which case making sounds might not be for the best!


What I went for was a 'pretend to play' page using felt pictures of a few instruments and encouraged the mimicking of playing, both in actions and/or sounds.  Her mommy plays the guitar, and she loves to play the piano at her grandparents house so these were already instruments she knows ♫


A close up of some of the instruments as I went along.  I hand stitched the names of the instruments on each one, as she gets older I hope she'll not only see the instrument but learn the words too :-)  The piano was my FAVOURITE of course, but also the trickiest to create.  Especially the keyboard part, which I used thick embroidery thread for the black keys, and then thin regular thread for the definition of the white keys. 


What shall I wear today?

That's what this little girl needs to decide!  My 'dress a girl' page was on the original list, and was always going to be a part of this book...no doubt about it!

I used to love paper dolls, do you remember?  With those little fold down tabs?  That's the kind of play thing I wanted to create here :-)


The left hand page was a felt closet (done with a few simple measurements of the space I had available, and some folding before sewing down onto the yellow felt page.  I used 2 buttons to imitate door handles, and doubled the inside door edges for a little more details.


On the right hand side is the girl, felt body and hair with a small bit of hand embroidery for the eyes and mouth, she is wearing underwear, and with 2 velcro pads for top half and bottom half clothing!


For this lucky girl I made:  1 dress, 1 skirt, 1 pair of jeans, 1 t-shirt, 1 soccer shirt, 1 pair of shorts and a swimming costume (I still can't get the hang of saying swimsuit here!).

I used fabrics I had already in my stash, embellished a few pieces with some embroidery - the heart on the white shirt, the purple polka dots, and purple ribbon belt, the anchor for a water theme, and the pocket and zip detail on the jeans.

How to attach the clothes to the closet was something I had to think long and hard about... I had attached each item of clothing to card stock (just like the shapes) with a square of velcro on the back so I had to definitely include the opposite velcro side to the closet somehow, somewhere.  I thought about individual pieces, as well as a pocket/pouch as I had done with the shapes but in the end (and I apologise you can't really see it in the picture) I did 2 strips of velcro machine sewn to the closet horizontally 
across - just like your clothes rails :-)


I think on the day we gave our birthday gift, this was the favourite page so far!!  This little girl was dressed up in all the different outfits, went swimming, played soccer and I think tried on everything in one combination or another, yey ♥


The weather today is...

Well today was pouring rain.  Absolutely soaking wet all day.  As was the day I made this page.  However, for the 2nd birthday party at the farm it was glorious sunshine which was perfect!


I guess I am lucky in that I am making this in a country that really does see all weathers...when it's hot, it's really hot, but there are real snow days too!  As well as some rain, and milder days.  All the seasons for Canada!


I think you get the idea by now - I used a combination of card stock... felt pieces (including a fiddly snowflake!), hot glue and then velcro to attach to the opposite velcro pieces sewn onto 4 points of the right hand page.


The text for this page was the largest of them all so that there was room for the decision to be made as to which circle of weather would fit finishing off the sentence 'The weather today is... ***'.  Let's hope tomorrow is sunnier :-)


I hope that there have been enough details here in this post to inspire you to create a book like this for a little one in your lives :-)  I had SO much fun making the book, creating the pages - thinking about specific ideas, creating fun learning experiences in a custom made book! 

The hardest part of the book was maybe punching the holes!  Felt does not want to be maimed!  Scissors and cutting = fine... Hole punching in any way = not fine.  In the end I used a meat thermometer and a potato skewer before making the hole slightly wider with thin scissors (weird, yes I know!) but that worked a treat, so go with what works for you... Or if you have a better idea for me, please let me know!!

Once the book was all made and done I kind of didn't want to give it away :-D  But I did, I promise!  She played with it through the day we were there with them all.  So far the dress up page, and the shape matching were favourites, and I also saw some awesome pretend playing of instruments ♫  Yey!  


Happy book making everyone!  Have a  great week :-)

Sunday 16 June 2013

♫ High Five to my students! ♫

As the school year draws to a close, I thought I would share with you the baking I did for my piano students, as their 'student appreciation' gifts!  There are so many teacher appreciation gift ideas around, but I love to give my students a little treat at the end of the year, at Christmas time and before the Summer break.  Just a little something to reward their hard work and their piano achievements during the year.


This year they have made me a very proud piano teacher! ♫  I had 5 students taking their VERY FIRST ever piano exams this April and they all did SO well, some with really great marks and comments/feedback so I am very very proud of them for all they achieved.  I have another 2 with Summer time exams and I am so looking forward to being there for them and working with them on these.  

Yesterday was also our Summer recital, and the students of mine who were able to perform did a fantastic job, worked hard on their pieces and played really well, having fun at the same time :-)  

Of course there have been a number of challenges too this year, there's the constant battle of practice with some children... some frustrated learning difficulties... etc etc, but this never wins over the amazing job my students do, the hard work they can put in, and the good feeling they get when they master something tricky.  

Hence my reward for them at the end of the year too!  This year I wanted to bake them a 'High Five' cookie, as I had never used a hand shaped Wilton cookie cutter I bought years ago (I think in Edinburgh 2010!) but knew would be perfect for this little treat :-)


I included a little note on the packaging saying "Well done on a great year of piano.  Keep playing this Summer :-)".  Now not all of my students have had these cookies yet, so parents, if you're reading sshhh, don't tell them!  I teach at a school who is done for the year so our lessons are done for a while.  I have a bunch of students continuing with Summer lessons but I decided to give out the cookies now anyway, as the end of school year treat.  My in-home students will be getting theirs in the final week of June!  I hope the note reinforces what I have been telling them about continuing to play.  I also gave students who I will not see over the Summer an activity pack, with some piano challenges, things to try at home this Summer in their playing, some Summer activity worksheets and some manuscript paper to compose some of their own music.  Let's just hope everybody keeps their fingers in piano mode, and they don't forget their 'piano brains' before September!!

So, about these cookies...

I baked a sugar cookie using a recipe I had used before.  It was a simple recipe to make, and kept it's shape pretty well, which was lucky as I was a little worried about how the fingers would look once cooked.  Especially as this was the first time I had used the cutter.  


Ingredients all ready to go.  But in case you can't guess what the measurements are from this, I'll write the recipe down too :-P  The recipe I made states it makes 4 dozen cookies - I haven't used the whole batch yet but at the end of June I'll let you know how many of the hands it made :-)

Ingredients:

3/4 cup unsalted butter
1 cup sugar
2 eggs
1/2 teaspoon lemon extract
1 teaspoon baking powder
1 teaspoon salt

Method:

1.  Pre-heat oven to 400°F and then in a large bowl, cream together the butter and sugar until light and fluffy.  
2.  Beat in eggs and lemon extract.
3.  Combine the flour, baking powder and salt, and gradually add to the creamed mixture and mix well.
4.  Cover and refrigerate for at least 2 hours or until easy to handle.


5.  On a floured surface, roll dough to 1/8 inch thickness...  

Alright, with a chunk of dough ready to go I got rolling and cutting before placing my cookies on a greased baking sheet and baking for 7-9 minutes (or until lightly browned).  


I LOVE the hand shape and am already thinking about other ways to use these cutters again.  Perhaps engagement cookies?  A silver ring and silver ball for a new shiny ring celebration!?!  A 'helping hand' cookie?  Hmm, what else?

I went with the 'High Five'... which kid doesn't love to give/get a high five!?  And this one's edible :-)  While the cookies were cooling I made these labels in Word and printed them on coloured card.  Chopped and hole punched, they were ready!  Should I make these into a PDF for all to share and print?  I think I will...just bear with me, it will be here in a couple of days :-)


Cookies cooled, and seeing as my first few were going to be given out the following day, although it was late in the evening (as most of my baking ends up being) I thought I should get going on the royal icing decorations, just in case it took a while to dry.  I didn't want the humid weather to mean everything was still sticky when I had to package them up!


A little outline test to check the fingers would still be seen once the icing was there and then I got to work on piping and flooding the cookies.


I used a Royal Icing recipe using 2 large egg whites, 2 teaspoons fresh lemon juice and 3 cups icing sugar mixed together and coloured some of this blue.  You may need more/less than this, I had some leftover from the initial 15 cookies I made but haven't finished yet, so I'll make some more icing at the end of June.


Late in the evening meant I didn't want to have to stop and get photos every few minutes as I went along, so Jonathan kindly took a few while I worked!  Please excuse the blurry moving ones, I obviously didn't want to stop with that icing, not even for a second!


All the cookies were finally flooded, and actually some of the first ones I had flooded were already starting to dry so I risked piping the writing on them, really REALLY hoping the colour wouldn't bleed into the white.


The risk luckily paid off, and the writing was fine so I managed to get everything done before bed!  I was super pleased with the blue on white and the writing I piped.  Most of them anyway.  I had made a few extra  which meant for some practice runs and/or discard cookies...discard into our tummies that is!

The next morning I did some photos before packaging them up ready to be given out at the end of each final lesson!


I was pretty pleased with how these turned out, a simple shape with simple blue writing on white flooded royal icing topped sugar cookies.  BUT a fun idea, which the kids loved!!  :-D  Yey! Success on winning their approval hehe.  Many also couldn't believe they were homemade (now THAT feels good!), so well, that was nice!


I've got a batch of cookie dough in the freezer, and the other high five tags already cut out so just a little more baking to go and all of my students will be well and truly 'appreciated' in my piano students' favourite way...food treats! 

Congratulations on a GREAT year of piano everybody, you make me so proud! :-) ♫